Before we learn how to draw a tent, I think you should know what a tent is. Basically, a tent is a portable shelter that has been used since before the middle ages. There are stories of nomads who used a tent in their everyday lives while traveling the lands.
Even now, militaries use tents for shelter while in a foreign land on missions. Of course, we can’t forget about the hikers and travelers that use camping tents for sleep and relaxation. Due to Covid, many aren’t able to go camping or glamping but kids can still draw a tent inside their home and daydream about it.
Generally speaking, a tent uses rigid wood or metal to make its framework, while durable cloth covers the entire thing.
Here is an emergency fact about tents. You can use things like curtains and other materials to make a tent in an emergency. First, simply place two stakes in the ground with a string or rope connecting the two. Finally, hang the cloth or tarp on the rope and staking the ends. For a more detailed explanation, we have on how to fold a tent both cabin and dome style.
Now that you have some idea about tents, it’s time to learn how to draw a tent with step drawing tutorials. Now comes the easy step-by-step instructions on how to draw a tent.
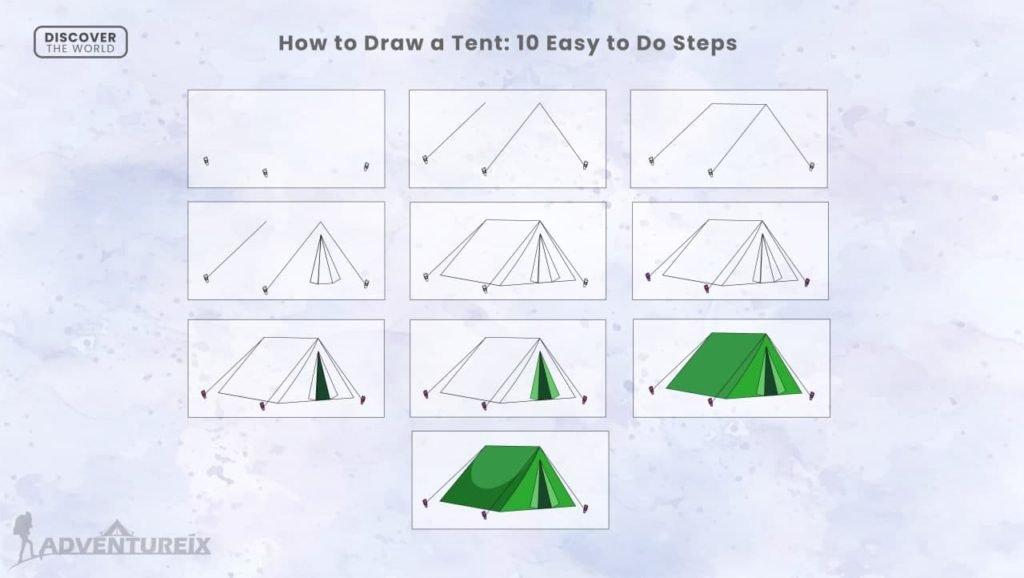
Step by step drawing tutorial: Draw a tent
Time Needed: 5 minutes
In a few minutes, this is a simple drawing tutorial for everyone, from kids to adults. The tent in this drawing practice will be your standard cartoon tent. Therefore you will not need any kind of special tools or techniques.
All you need is a piece of paper and a pencil. So let’s get started:
Drawing tent step 1
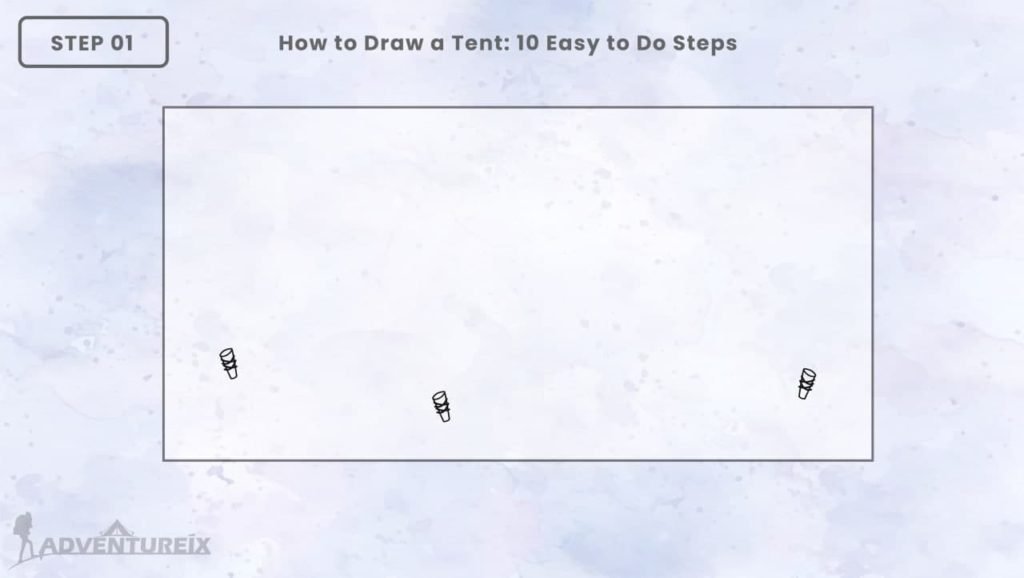
Draw three individual rods with two on one side and one on the other side. These rods are the tent stakes.
Tent drawing step 2
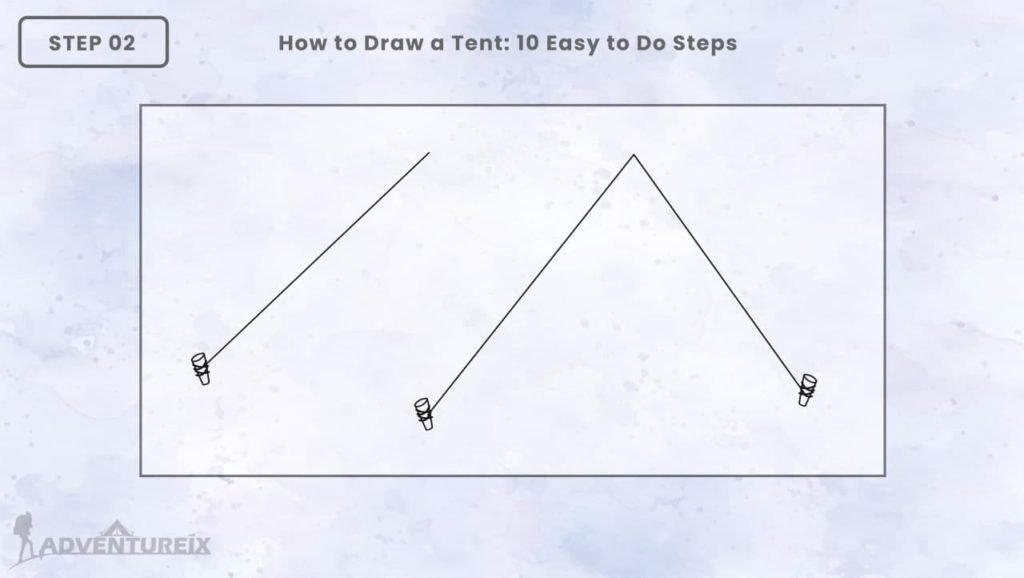
From each of the rods, you need to draw the line at an angle—the lines from the tent stakes at the front need to meet.
The lines that meet need to make a triangle shape also; the length and angle for the lines need to be the same and not at a slight angle. The triangle at the front will be the tent’s front.
Drawing tent step 3
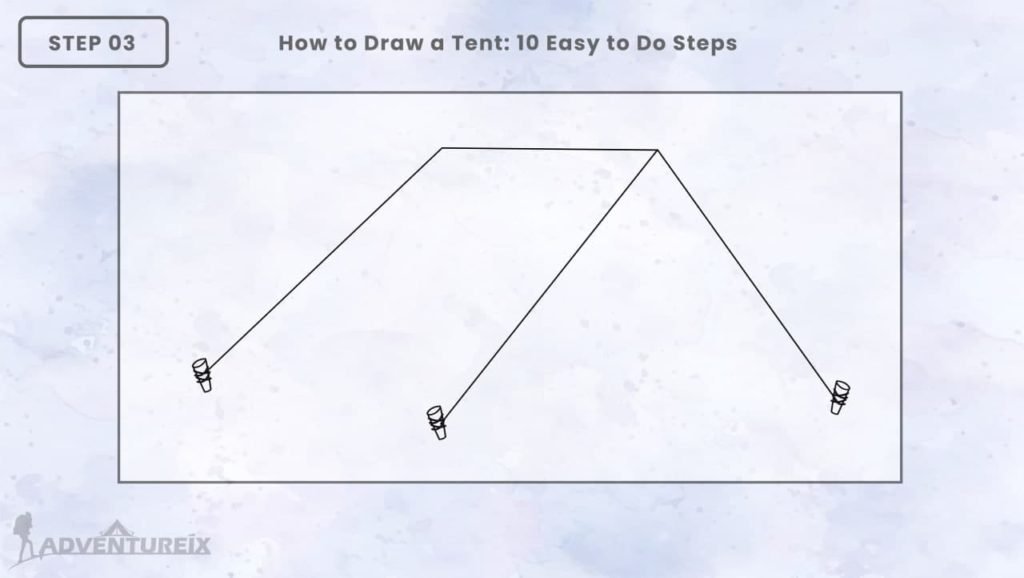
Now draw a line from the top of the front triangle to the line at the back. This line will be the roof of your tent.
Drawing tent step 4
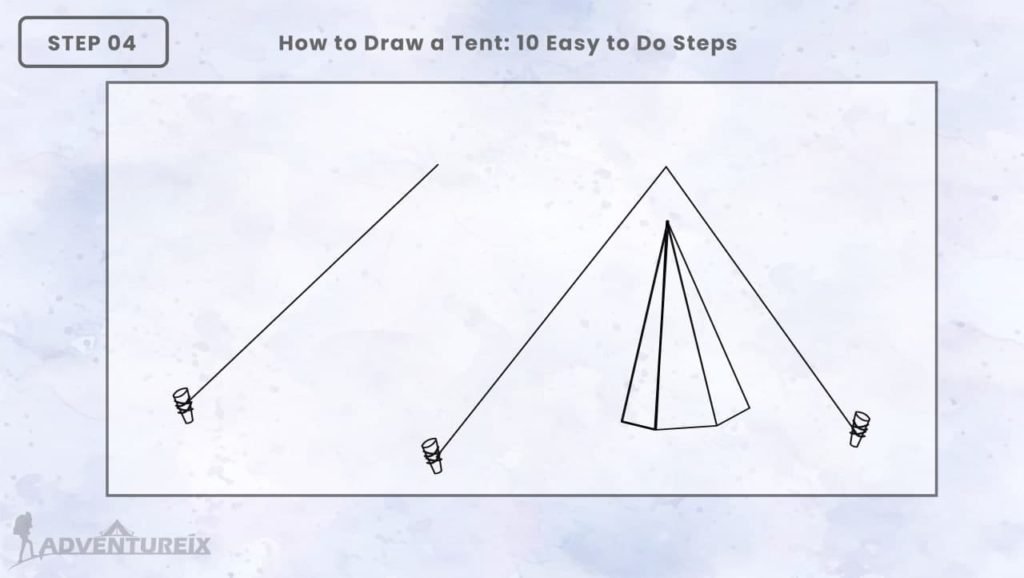
At the front of the tent, draw a broad triangle at the bottom and narrow at the top. The bottom of this triangle will be a curved line. So you need to draw a curved triangle.
Inside the new triangle, you need to draw two lines that go from the top to the curved lines at the bottom. This is the door of the tent.
Drawing tent step 5
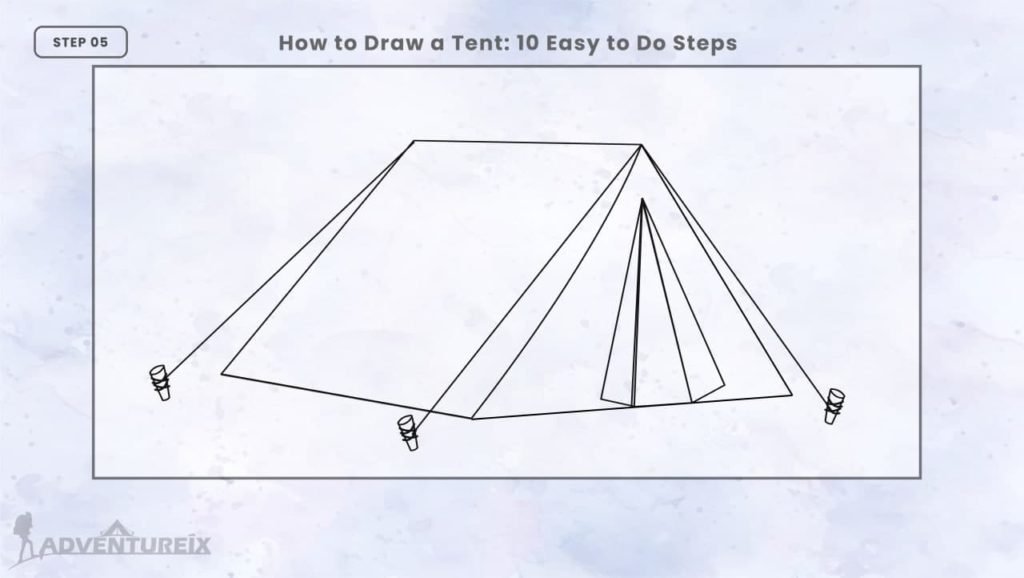
Now to complete our tent’s body. Firstly draw an equilateral triangle that surrounds your tent’s opening. An equilateral triangle has the same angle at the top and bottom.
Next, you will have to draw basic shapes like a rectangle on the side of the tent. Again, make sure to keep the lines straight and equal.
Drawing tent step 6

We will be coloring our tent in different colors from this step onwards. So keep all your color choice simple and basic. Since we are drawing a tent, you could choose earth-toned colors such as shades of brown and green.
Firstly you will be coloring the tent stakes that you drew first. Since these are pins or stakes, you could go with black, but we went with pink for your example. This is mainly because we wanted to be funny.
Drawing tent step 7
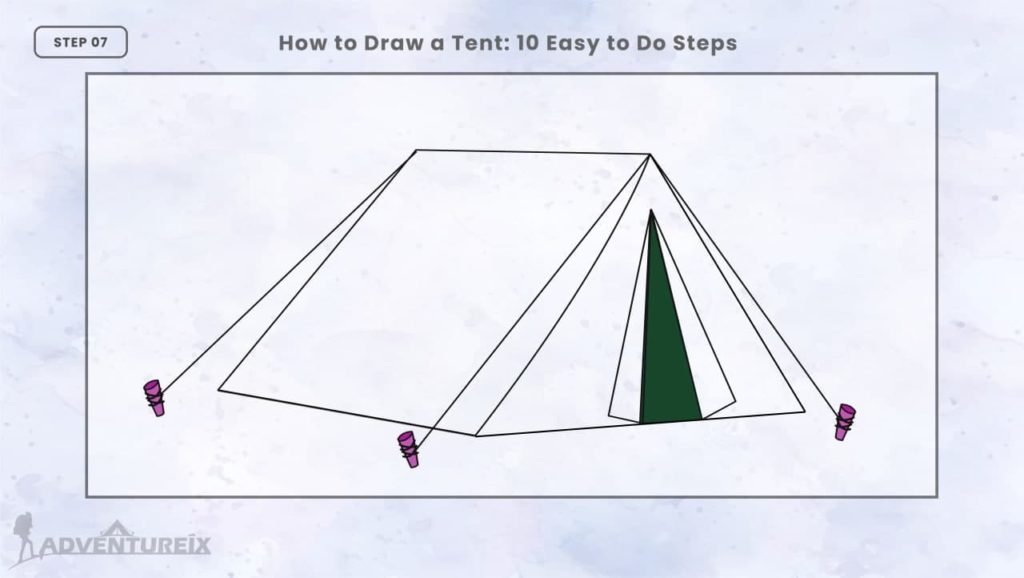
Now we will be coloring the inside of the tent, which can be seen through the tent’s door. Like we said above, we will be keeping the color choice earth-toned. That is why we are selecting a darker shade of green.
Drawing tent step 8
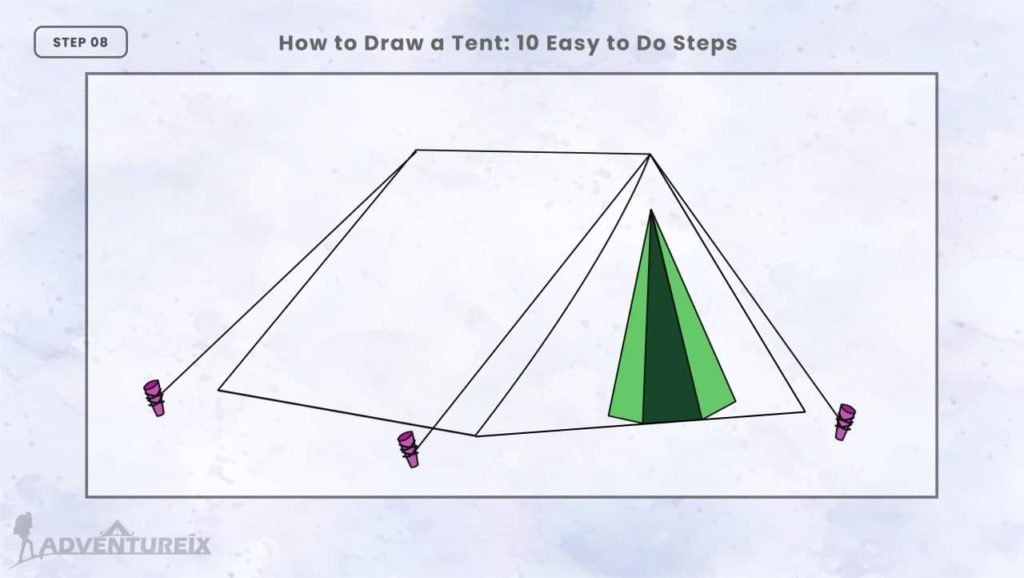
In this step, we will color the flaps of the tent door, and to create some contrast, we have selected a lovely shade of light green.
Drawing tent step 9

Finally comes the outer shape of the tent, which we colored using the basic tone of green. Do be careful to stay within the shape of the tent. Also, make sure that the entire tent is colored evenly.
Drawing tent step Final
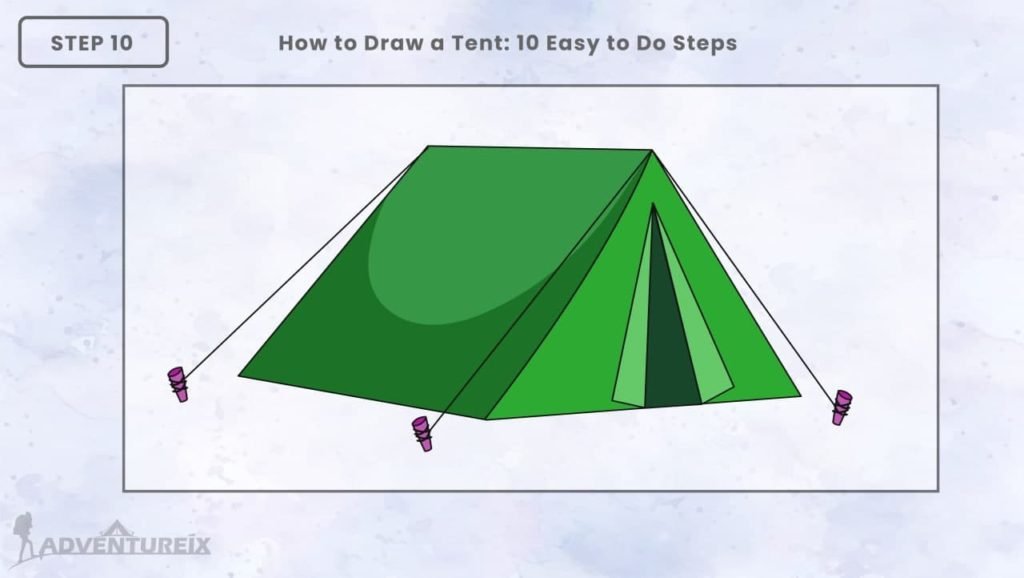
To make the shape of the tent more 3D, you can draw a large semi-circle at the top of the rectangle you drew in step five.
This semi-circle can be colored with a shade of green that is in between the basic green and green you used for the tent flap.
Overall you could color your tent in any color you want with a few other details to make the tent unique.
Conclusion
Hopefully, you found our ten steps on how to draw a tent to be both fun and straightforward. Adventureix is always there to provide you with the best and simplest guides. For example, drawing a tent is one of the easiest projects for beginners and experienced. So feel free to add some camping gear and whatnot as well.